Monday, December 29, 2014

Gifts I made this Christmas

I made a few gifts this Christmas for my family.  Here are a few Birthday books that I made for my Daughter and DIL to keep track of Birthdays over the coming year..
 I used grey board and a mixture of papers for the covers and some lovely sticky back pink velvet paper inside on each of the pages for the first one I made for my DIL.


This one was covered with some gorgeous wallpaper because I knew my Daughter would love it.
 I made these little hanging penguin cards (inspired from the ones in John lewis this year) for my Grandchildren to hang on their trees.. I love their honeycomb paper bellies and so did the kids! Lol

Thanks for visiting my blog today.. I will be back tomorrow with 2 clocks I made for gifts this year..
BFN xx

Monday, November 10, 2014

Signature Stencil Sample cards

Here are some sample cards I made using the new Signature Stencil / Masks that I designed for  Joanna Sheen..


Embossed purple card panel - inked lightly over with Tim Holtz seedless preserves.

Embossed pearly card


Watercolour crayon technique.  I found this wonderful technique on the web here - the only difference I did was to run my mask through my cuttlebug to impress the colour onto card.. it works really well.

I embossed - inked with versamark and brushed mica powder over the panel. I used the new Signature Classic Lace background die for the panel on the right.

I appliled ink to the stencil and run it through the cuttlebug to get this look

Simple embossed and sanded back to get this look

Another Watercolour crayon tecnique - using golds, silver and white crayons with a touch of blue.. it gives a more soft look

Back panel was embossed and sanded back and the front panel is more watercolour crayons.

 Embossed parchment paper first - then coloured flowers on back with promarker pens, then I hand embossed each flower to get this effect.  The butterfly is from the I love knitting stamp set

Thank you for visiting today.  I hope I have inspired some of you to dig out your own stencils to play with or go along to the Joanna Sheen Website and treat yourself :)

Wednesday, October 29, 2014

Vintage wedding frame

This is a sample using one of Joanna Sheens wonderful new MDF shapes - I added a vintage bride printout behind the Horseshoe MDF shape and threaded ribbon through the holes.


The frame is an Ikea Malma frame that I painted white first.  I used some lovely cream textured card to die cut the hexagon shapes using Joanna Sheens large Signature Patchwork dies.  As the card is textured on one side I decided to emboss some using 2 different embossing folders but leaving some shapes blank. The roses are from the Rose and heart frame Crafts too embossing folder, I then used a versamark pen to hightlight the roses and heat embossed with white powder.  I stuck the patchwork pieces onto the frame with Pva glue and then lightly inked the edges and the roses with distress ink to add a more vintage look.   I glued the cream ribbon around the inside frame and over the lace adding some buttons to finish.


I really enjoyed decorating this frame and can't wait to make another one... maybe with a patchwork baby theme.. :)
Thanks for visiting my blog today.
Hugs
Sylvie x


Wednesday, October 1, 2014

Signature Stencils by Joanna Sheen


There are some wonderful new 6" stencil / Masks available on Joanna Sheen website.  All of them are very versitile and useful and will look fabulous in so many ways.  I will be showing some sample cards soon.
Here are the stecils that I designed for her:


Thanks for visiting today :)


Monday, September 1, 2014

Klimt inspired art

I love all things Klimt. I was asked to do my version  of 'The Kiss'.  I have done several (using various mediums) over the last 10years because I love the feeling the painting evokes especially the original done by Gustav Klimt himself over 100 years ago. 
  
I took some pictures of some of the stages during my creation.  This time I used H2O watercolour paints, Primarker pens, Tim Holtz Distress Inks and of course lots of my gorgeous foils.
Here is the finished painting.. It is 15" x 20" I am very pleased with it.


I started by drawing the outlines of the people. I used promarkers to colour the skin tones and hair and because I wanted their clothes to shine like gold so I decided to use H2O's to colour his and her clothes.. these paints are loaded with mica and give such a beautiful sheen which is perfect for this painting.  You can see the glow of the paints in this picture.  .

 Then I painted the cloak that surrounds them both using a lovely rich yellow H2O paint.

 
 Then it was time to prepare my background.  I masked off the edges so they would be neat and used lots of Chipped Saphire, Aged Mahogany and Gathered Twigs Distress inks... then sprinkled water all over and lifted the ink with kitchen towel to make the dreamy looking background.  Later I flicked some Solar Gold H2O paint on aswell to add lovely golden sparkle around the couple.

 
 I cut a piece of card to shape of the ground they are kneeling on and used lots of ink and alcohol  pens in very bright colours Lol.. 


 I added foils lots of  the patches all over his coat using various shades of golds, silver and coppers. I used a glue pen to put the vines that fall down from them and then cut small triangles of dst to add more gold foil. I filled in the details on her face and added more coloured foils to her dress.
I am sure this won't be my last painting of the Kiss Lol... there are so many ways using so many different art materials that this picture can be created.  Thankyou for visiting my blog today and I hope you like my painting.

Saturday, July 12, 2014

LIM week 180 - One layer card with fingerprints!

LIM week 180
What a lot of fun the challenge is this week over at the Less is More Challenge blog... Adapt a fingerprint on a one layer card.  Well technically, I'm not sure this one will fit as I did use my Thumbprint for each balloon Lol..  I masked each thumbprint as I went with a balloon shape cut from paper - and then I used a white gel pen to draw around each of them to create balloons!  The Beautiful stamps are from the Little Suzys Zoo design  available from Joanna SheenI coloured the characters with pencils - plus I coloured around the edges of the balloons to try to make them pop a little..(not actually pop Lol..)

Thank you for visiting today :)


Saturday, May 24, 2014

Sylvie Ashton Cardmaking Pad samples

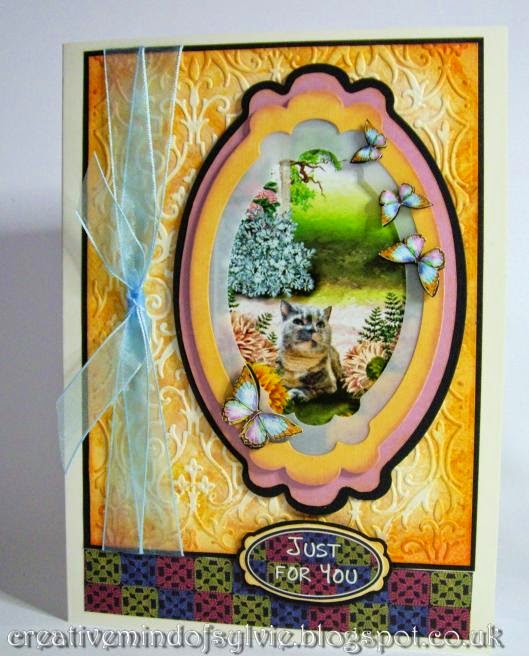
Here are the samples I made using the New Sylvie Ashton Cardmaking Pad.  There are 12 different designed pages (2 of each) they all have a topper with either some decoupage or embellishments, they have borders and greetings on each sheet.


Thank you for visiting, comments are always welcome :)

LinkWithin

Related Posts with Thumbnails