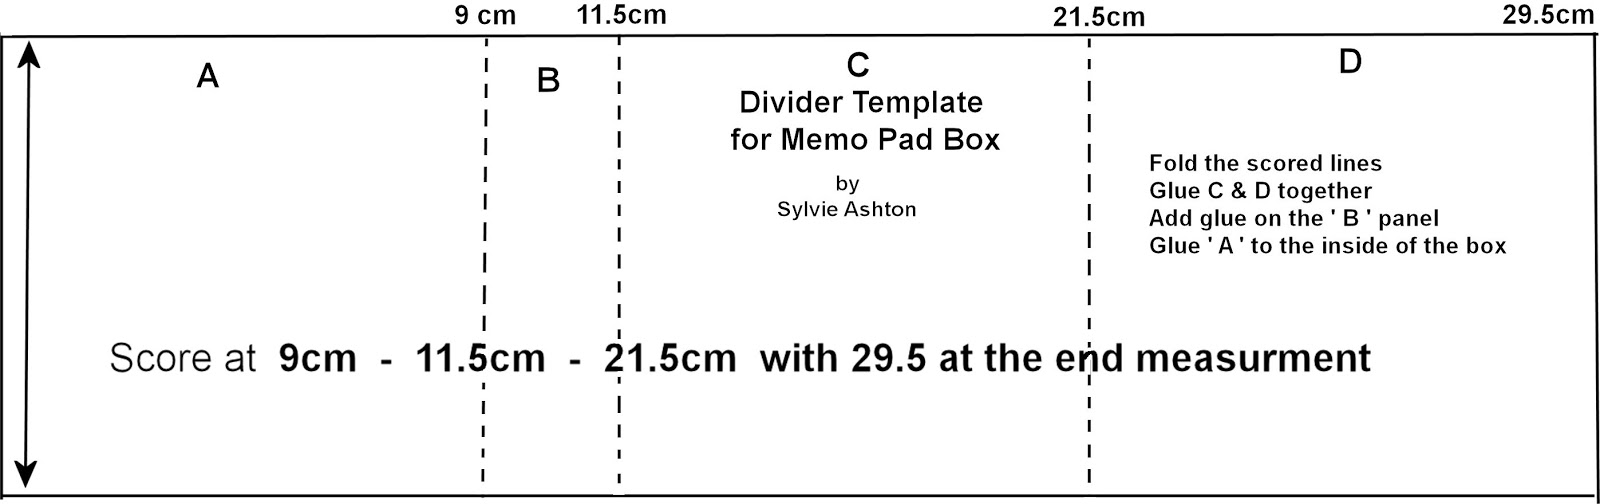
I had a lot of fun making these cards for Joanna's return TV show on Create and Craft TV.
Buzy
Lizzie die Sample
I
used half 3 1/2” circle for the hanging basket
Coloured
with promarkers. I used the
Buzy
Lizzie,Wisteria leaves and the
Ivy
Florish dies All the die cut flowers
and
leaves are coloured with
promarker
pens. Backing paper
from
JS Collection Pad 3
Loiusa
Lace die Sample
Cut
4xOcean Corners coloured with various promarkers. The Background is
inked with distress
and
water splashed and blotted to create Bubbles-which I outlined with
white gel pen. Seahorse cut 4 or 5 times and layered up for extra
thickness.. coloured with pens and added crystal laquer.
Backing
paper from JS Collection 1 pad.
Thomas
Kinkade pad sample
Cut
out and mounted images from page. Cut out panels from JS collection
pad 1. Backing papers from JS collection 3 pad. Ivy flourish and
leaves from Busy Lizzie coloured with promarkers
Die
cut Delphiniums and coloured to match picture.
Lace
is Clarissa lace Edger die
Lace
Corners 1
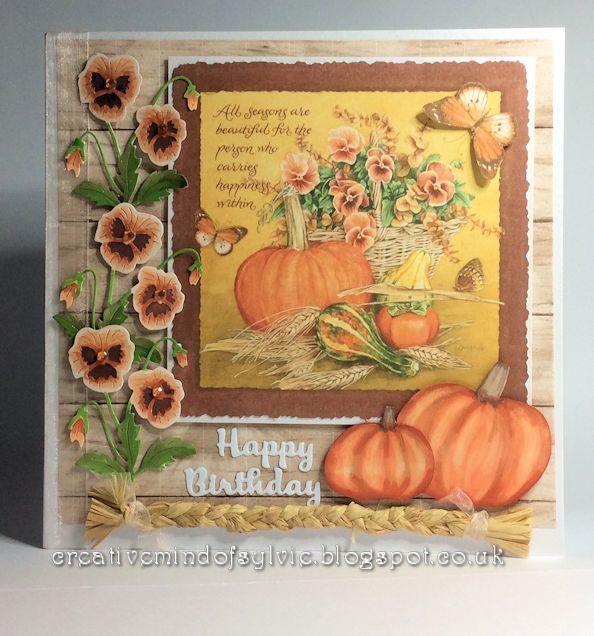
Pic:
Marjolein Bastin (Autumn Pad)
Weave
effect paper: Paper Vol 3 Pad
Sparkle
pen drawn tree bark onto
black
paper.
Lace
Corners die cut from Kraft card
First
Dance
Backing
paper from Paper Vol 1 Pad
Background:
Die cut couple with black card layering them back to front between
vellum
paper
Main
couple cut with black and 3 x white card
cutting
the dress and layereing it with vellem
in-between
to create fullness.
Isolbel
Lace along the bottom.
Isobel
Lace
Pic:Marjolein
Bastin (Spring Pad)
Roses
Backing Paper:Paper Vol 1 Pad
Paper
frills: Denim Paper: Vol 3 Pad
Katy
LaceCorner
Pic:
Marjolein Bastin (Winter Pad)
Inked
background with Bundled Sage
and
Hickory Smoke Distress Inks
Lace
dies coloured with Promarker pens
Pastel
Beige and Kharki
Poppy
For
the main topper I used watercolour paper with distress inks
splattered with water to lift some colour.
The
Poppy die was cut many times coloured with promarker pens. I placed
various parts of the Poppy dies to create a scene between torn edges
layered at the bottom of the topper and on white card on the panel.
I
cut an oval and used a lace nesty to edge it.
Pink
Backing paper from Paper Vol 3 Pad.
Thomas
Kinkade from Pad One
Die
cut lots of Wild Rose and leaves and Wisteria leaves – using
Promarker pens to colour the 2 shades of green Rose and grey
Wisteria leaves
and
the Rose flowers and buds in various Pink shades. Adding Stamens in
the Roses and along the arrangement.
Thomas
Kinkade pad
All
the layered papers are from Paper Pad Vol 3
Thomas
Kinkade Pad Vol One
Orange
coloured Wild Roses to bring out the colour
of
the warm cozy windows.
Wisteria
This
is a deep card that has 3 layers of card with
3
sizes of nesting dies, cutting them further up the card from the one
one before to create a tunnel
effect.
I measured and cut a panel under each of
them
-each a bit bigger so as to keep the layered
look.
I cut many Wisteria flowers using Pormarker pens to colour them with
various pinks and purples. I positioned the Thomas Kinkade picture
on
the
lilac card and added each of the card layers with foam mounting tape
adding the Wisteria and leaves
as
I went along so that the Wisteria pops out from each layer.
Thanks for looking :)