Showing posts with label Martha Stewart punches. Show all posts

Tuesday, March 5, 2013

Joanna Sheen VINTAGE FLORAL STAMPS

Here are the sample cards I made for Joanna Sheen to go with the new stamps I designed for her called:  Vintage Floral - Thinking of you and Forget me not.

Inked roses spritzing stamp and paper

before stamping down for watercoloured

effect. When dry overstamped with black momento ink and coloured rose with

promarkers using white gel pen to add highlights. Stamped roses on back panel

with pumice stone ink.


  Flowers stamped with coloured ink –

coloured in with a mixture of water

colouring and promarker pens.

Vases are punched circles inked.

Stitching was glue pen and foil.


  Prima firefly paper. Tulip stamped with

TH distress ink-frayed burlip. Promarkers

to colour. Used while gel pen to highlight areas of Tulip. Lightly inked and embossed around edges to match sentiment.


Step card with 3 equal parts.

Used ink on acrylic block to create

background.Stamped with momento, 
coloured with promarkers and pencils, Used white gel pen to

highlight parts of flowers


Cut 6x6 card down to shape. Cut 2 pieces

for pop ups. Decorated with die cut ovals.

Inked all edges with TH Peacock feathers distress ink. Tassels , image,, sentiment, lace heart and verse on front - gold embossed. Puched small flowers with MS punch.

Stamped roses on front panel, then

embossed through machine with script

folder then lightly inked up. Stamped back

panel with pink ink.

Roses stamped twice and layered up.


 Stamped pansies 3 times for layering with

Dusty concord distress ink.

Glazed 3 flowers on top layer with glossy accents. Sentiment stamped and heat embossed with clear powder.

Stitched organza pansies from

ribbon coloured with promarkers to

match image


  Made base easle card from 6x6” card.

Used my templates for teapot and cups.

Stamped roses on them – then masking to ink with antique linen for colour.


 Here is the template I drew to create the teapot and cups
please feel free to download and use - click on for larger image.
It will fill an A4 sheet. 

 
Thank you for visiting


Tuesday, March 6, 2012

Jane Shasky Stamp sample cards Day 2

Today's samples are from the stamps on Jane Shasky rubber stamp sheet - Relax and enjoy


This card is 6 x 6" with a gatefold. I stamped and coloured the image with promarkers cut it out and mounted on foam tape onto a pretty shaped card with gems and ribbon added. The inside of the card looks like this...
I used Jane Shasky CD backing paper to show the verse of nicely.

Here is another card made using the same image...
For this card I stamped and embossed 2 images onto black with white embossing powder and then again twice onto cream and black embossing powder. Making sure all the squares were exactly the same size, before I grouped them on to the card I lightly inked the edges of the cream squares and the verse topper...finishing off with a few gems and little silk Roses.
The other image on the sheet is this lovely Window box

The backing paper is from the Jane Shasky CD. I coloured the doily with promarkers. The tag is the verse stamped in Weathered wood ink, then I decided to try to match the tag to the paper (it would have been easy to simply stamp onto a piece of the same backing paper duh!!..).. but it was an after thought... so I used promarkers to colour a similar pattern.. I used a white gel pen to shadow the letters to make them stand out more.. Alot of cards that I make grow as I do them... Lol..
I stamped the image using Tim Holtz weathered wood ink. I carefully coloured all the flowers and leaves with promarkers and decided to leave the window frame and box white, so I coloured the windows pale blue and the outside of the frame grey..I think it makes the image pop out.. heres a close up.
I added a few punched butterflies that I coloured with promarkers..

Thanks for visiting my blog today... and as usual, your comments are very welcome..
HUGS X

Sunday, November 20, 2011

Joanna Sheen's Christmas Flower stamp Sample Cards


Hi Bloggers, It's been a while. I've been super busy with making sample cards and my own Christmas cards. I've also not been able to get onto the computer as much as I would like for other personal reasons.
Anyway, I realised that I didn't show the card samples for the Christmas flower stamps that were shown on TV over a month ago,well it's not Christmas yet so .. here are my 2 from each option:
The Candle option of these stamps has some lovely designs. I used the musical sentiments as tinsel on the tree and for the background - I embossed with white powder and inked with Tim Holtz aged mahogony pad for the background paper. The angel stamped and embossed with white powder looks good on the top of the tree. I used the sentiment from the Music option with a few punched birds (MS punch) each side and on the tree. Talking of the tree, I stamped the Angel over and over in green onto a piece of paper and punched out lots of snowflakes and arranged them into a tree shape. 8" x 8 " card.

Here's the second card using the Candle option:
I have used the main design stamped with versamark and embossed with white powder. I used Tim Holtz distress inks to colour the image using one of my acrylic blocks to mix the colours with water. The fancy top is part of a spellbinders die - Lables 20 to give a nice edge. 6" x 6" card.

The Music option has a beautiful design plus a lovely Poinsettia and sentiment.
Here are my cards.
I stamped the main image twice with versamark and embossed both with white powder, the one for the back I cut to size and inked using Tim Holtz Barn door ink pad. (very messy! he he) then I used the other stamped image to cut out the poinsettia flowers to lay on the top. The backing paper is the single Poinsettia flower stamped over and over using a mask so that they can be overlapped neatly... again I used the Barn door colour inkpad - I think this makes a stunning background paper. I stamped a few extra for the embellishments and added some punched out Poinsettias aswell.
Here's the second card for the Music option..
A pretty Tent fold card with the image again white embossed and coloured using the distress inks. I layered the image onto a vintage doily to add texture and stuck gems along the MS punched bottom edge. The holly paper is from Papermania.

The Star option has the most lovely wooden star with Merry Christmas on it, plus a lovely arrangment in a box and some Christmas bells. Here are my two cards.
First of all I decided where I wanted the line for the bottom of the door and stairs and lightly inked over a straight edge with Antique linen, then I stamped the star and then drew the lines of the door around it. To create the look of the stair banisters I used a deep edge Martha stewart punch and red card but inking the area first before I stuck it on. I used a mixture of H2O's and distress inks to colour the flowers this time. 6" x 6" card.
Here's my second card.
A mixture of embossing folders to create the fireplace on this tent card. Paper from Papermania and holly punched and coloured.

The Wreath option has a lovely Wreath, bauble and sentiment.
Here's my first card. 8" x 8" card
A mixture of large MS border punches to create the gate and the brick embossing folder from Creative Expressions for the little bits of wall on each side. I used torn white card for the snow effect. The wreath is coloured with promarkers. I love the cat from the Ivory Cats CD, cheeky little thing..!
and finally, the second card for this option and last out of the samples...

I've had the white card with flecks in for absolutely ages.. I love how it looks like a frosty window here. I stuck 4 identical cut out squares onto a larger blue square to create the window.
I also stamped onto the blue paper and embossed with white... then added my own foiled sentiment. 6" x 6" card.

Thank you so much for visiting my page today. I will have many more samples to add here as each new set of stamps are launched on Create and Craft TV.

Hugs xx

Saturday, July 23, 2011

Less is More - Week 25

The challenge over at the Less is more blog for this week is to use Buttons or Ribbon or both.

I immediately wanted to do this A5 card using an idea I came up with a few Christmas's ago. I have used a Marth Stewart snowflake punch to build the wreath adding buttons and red dots.
Thanks for visiting... see you soon

Hugs x

Sunday, June 5, 2011

Less is More week 18 - Monochrome

The challenge set for us Limettes this week is

MONOCHROME
Definition:
in shades of one colour, using or displaying only shades of one colour or black & white.
Although lots of ideas flashed through my head when I first saw the challenge... I soon realised that this could be a hard one for me, as I love to use lots of colours. , so I spent most of the day yesterday just thinking about what I would like to do.

I decided to use the Pressed Flower Roses stamps from Joanna Sheen.in Shades of RED.

I created a background paper : I stamped an A4 sheet using various roses, masking them and then stamping the two sizes of rose leaves all with Tim Holtz fired brick distress ink, so it appears that the leaves are behind. Then I coloured the background using a red Promarker pen. I managed to create two cards out of the paper
The punched border is because I stuck the paper on Wonky!!.. so it covered that up... actually I rather like it more with the border... so it's a Happy accident as they say.. Here's the next card using 2 strips of the same background paper.


The butterlies are punched from the Martha Stewart large butterfly punch and coloured with a red promarker.

...and here's another card that I couldn't resist doing using some paper roses I made using the sizzix die mentioned in the last post. and some of the stamped rose leaves - again I used Tim Holtz fired brick ink to colour everything.
Thank you for visiting.. I hope you like what you see.

See you soon...
Hugz

Friday, June 3, 2011

Thank you sizzix

We've been enjoying creating flowers at the craft club I go to using all sorts of punches and dies. I used the
Sizzix Beth Reames Flower 3-D bigz Die for the roses on the first card. I inked them up before rolling and added some stemens. I used a lovely Sizzix embossing folder for the 'Thank You'.... the butterflies are punched from the Martha Stewart stamp and punch ... and the beautiful textured paper on the bottom of the card is a piece of gorgeous fabric wallpaper.

Here's another card I made using the same wonderful Sizzix 'Thank You' embossing folder...


...Inking it slightly with Antique linen distress ink was needed on this card.. I added a border of Martha Stewart large lattace matching the corners up...all the little flowers are also from a MS punch..inked lightly again with little flat back pearls in the centres. I punched the butterlies and coloured them with promarkers and a white gel pen to make them stand out more and look sort of real Lol... well, artistic licence again..
I really enjoyed making these cards..... so Thank you Sizzix!!

Hugs

Monday, May 9, 2011

More WOW with Swans

I drew these swans the other day and had to make a couple of cards with them.
For the first card I used 2 embossing folders to create a background image and simply stuck the cut out swans with foam pads.. adding the words on the side like a tab. I pierced the edges of the card just to add more texture - a really simple card..
This will be my 3rd submission to the
Less is more challenge this week.. White on white cards are so much fun to make! here is my White on white card No. 3


For the second card, I printed the swans out twice, one for the background and one to add the cut out swans over the top. I used Tim Holtz distress inks to create the background. I decided to use a very pale blue card to blend with the image adding a pale pearlescent green card under the punch out area to balance the card. Of course a little bit of glitter had to be added to the wings..and small amounts to the water too plus a few pearls.

Thank you for stopping by my blog today..
See you soon
Hugs

Sunday, March 20, 2011

Better late than never....

My hernia repair operation was bigger than expected. I came home from hospital on Wednesday and have been resting since then.
It's been a whole week since my last post and I want to say a Big Thank You for the many wonderful comments I received on here, they were most welcome!
I haven't forgotten that I promised to show my sample cards that I made for Joanna Sheen's TV launch last weekend of the Tales of the Sea rubber stamp collection. I am delighted that so many of you enjoyed the turtle freebie last week, I hope I get to see what you make with it.
... I will show 3 cards a day, as there are 15 of them in total... with a brief description of how I made each one...Here's the first selection.....

I used 12 of the stamps on this card! I started by inking an 8" x 8" piece of card with Tim Holtz broken china distress ink and then sprinkled water and dabbed the drops to create bubbles in the background. The netting on the base of the card is the net corner stamped across and embossed. I replaced the banner with the diver with the dolphin, stamped some of the shells and the crab and fish, coloured them in with promarkers. The star fish looks more 3D because I used an embossing tool to score lines and creased where the raised parts should be and stuck with a few layers of foam pads. I also scored the lines in the the other shells to add texture. Twisting two shades of green ribbon was a last minute idea that I think really worked well to look like seaweed Lol!
Here's the next card...
I used my score board to create the planks of wood and then free scored the extra lines for the grain and then lightly rubbed ink to highlight it a bit.... Later I realised that the wood should have been going across the card.. never mind I think I got away with it Lol! I drew the circle port hole using a circular ruler and shaded with promarkers adding some silver nail heads for decoration. After stamping the diver and colouring her in, I inked the edges with blue... added the Happy Birthday into the banner. I finished by stamping the starfish and shells onto white card ,only adding pale colours to colour them.. I stamped and embossed two net corners directly onto the card - I scored the shells again stuck them down with foam tape and added some lovely little pebbles from my stash that I had been in a gift set packaging from the body shop Lol!
The very first thing I did with this card was to stamp and emboss the jumping dolpin border in blue onto a piece of 8" x 8" card. After triming it to size I punched the corners and inked the edges. To create the sea I tore a piece of copy paper in a jagged way - starting from the bottom I lightly inked towards the base moving the torn edge up each time until it filled the area up to the jumping dolphins. After stamping 3 dolphins directly to the card, I stamped and embossed 3 more onto white card and cut them out and raised them on the card. I punched out the other dolphin with a 3 " circle punch adding extra glitter and the banner inking it to match the rest of the card. This is a simple card but looks really pretty and great for anyone who loves dolphins Lol.....

Thanks for visiting.... I will add 3 more cards tomorrow..

Wednesday, March 9, 2011

Latest digi stamp

Here's a couple of cards made with my latest stamp in the shop - called 'Baby on Blanket'... I know I couldn't think of what to call it...so I called it what it is Lol!

I really enjoyed colouring him with promarkers. I cut along the edge of the blanket and layered the image onto some inked background paper that I made using distress inks, but first adding a row of doodly bits with a white gell pen where the edge of the blanket is to give a fluffy look... well, I think it does anyway... artistic license Lol!
Here's the second card I made... the baby had to be a little girl this time...

This time I experimented with using bits of polar white flower soft to give texture to the blanket... but I don't think I will be doing that again...or at least if I do, next time I will layer the baby on top.. but it's a learning curve fun thing with cards... if you try something new then you know for next time..

Thanks for visiting today.. I will be back over the weekend with some of the sample cards I made for Joanna Sheen - with my new rubber stamp designs that she is launching on Create and Craft TV on Sunday 2pm GMT... she might even show some of the cards too.
Catch you later...
Hugs

Monday, February 21, 2011

Clean & Simple weekly challange - Spring theme


Over that the "Less is More" weekly challenge blog the theme this week is 'Spring'.

Here is my card
I was given this UM rubber stamp (along with a few others that are similar) many years ago from a friend in US..(Thank you Lee if you are reading this) I have no idea what stamp company it is from I just love the image.

I stamped it using Tim Holtz Forest moss distress ink. I used a damp paint brush to colour in the leaves, a promarker (Putty) to lightly shade the flowers with a hint of pink then used a glue pen to stick some clear 'oil on water' effect foil for the wings. Here's a better view of the foil on the wings

I used a Martha stewart punch for the bottom edge.. rubber stamped the words again using the forest green ink... added the 2 types of ribbon plus a bow and mounted it all onto a white A5 card base.
I think it looks quite nice. :o)

I haven't had the chance to draw any freebies for a few weeks due to feeling poorly. I am enjoying making these cards in the mean time though.... I hope to be back to normal soon.

Thanks for visiting... your comments are always welcome.

Sunday, January 30, 2011

~FREEBIE~ Sunday 30th January 2011


I haven't created much this week but did play around with a copyright free dover image - creating a heart shape from a round one. I quite like it so thought I share it with you for this week's freebie.
Here it is:
I coloured a few laser print outs using Tim holtz inking all over and then blotting out the flowers so they are much lighter.. but I think I have the wrong paper... it needs to be more glossy. so I gave up with those Lol.. While looking through an oriental card pack I got years ago from C & C tv, I came across some stickers of lovely blue birds, so decided to colour my birds blue too.. Here's the card I ended up with. The backing paper and ribbons and borders are all from the same kit. the flowers are punched and layered using the Martha stewart Hydrangea punch coloured with promarkers.

I hope you have fun with this.

Thank you for all your kind comments last week. It went well in the hospital but I was left feeling quite sore for a few days, I am so glad these checks are years apart!!

Thanks for visiting.
Hugs

  • Please Read
  • Feel free to print out and use my digital images on your own cards and cards you make for sale, please remember that these are copyrighted to me and must not be altered , given, or sold as your own individual digital images., so don't pass my images on to others, give them a link back here so they can download it for themselves

Saturday, January 15, 2011

First post of 2011

A Happy New year to you, it's a bit late I know, but I hope you all had a good beginning to the year.

We had a death on New Year's Day in our family so I haven't felt like blogging over the last few weeks. Things should return to normal soon and I plan to be involved in blogland again hope to draw many more freebies for you to download during 2011.

In the mean time I want to share some cards I have made for Valentine's day using a fantastic tutorial I saw on Valita's Designs & fresh folds blog... using hearts. I will show my cards to you first and give you a link at the bottom of this post otherwise you will go there and not want to come back Lol!!.. her blog is addictive heheh Lol!... so here is a taster of how she inspired me..
I used some mini mosaics on her dress because I thougth they looked just like little sequins.. I used the Tim Holtz floral alteration die cutting red organza for the flowers.

Valita show us how to shade the heart like this.. it's great fun!

This is a simple wedding card using the heart idea... I used some lovely holographic card for her dress and drew squiggles with a glue pen and added glitter for a wonderful sparkle.. it looks like a diamonte encrusted bodice.

Well, as promised here is the link to Valita's fantastic inspiring blog with her own video tutorial for these hearts... Thanks for visiting today.. remember to leave me a comment if you are going to before to get hooked on her blog... LOL!!
Hugs to you all

Friday, December 31, 2010

Last post of 2010....~Something I made~

I wanted to make a 'handmade something special' for my friend. I found a wonderful way to use the Tim Holtz birdcage as a hanging ornament from this blog post and was completely inspired to make my own version with what I have. Here it is:
I used papermania papers for the bird and Martha stewart poinsetta and holly punches. the birdcage opens up:
I made the inside by layering 7 birdcage dies cut from mount board on top of each other after cutting away the bars.. creating a little area to fill up with embellishments. I printed tiny sheets of music and aged them with TH ink and stickles around the edges, added small amounts of green flowersoft, a few decorative brads and stars and punched holly. The crackle effect on the birdcage is die cut from wallpaper and glued on top. I added a 'D' ring to hold the two pieces together and hung a piece of scrap chain and a ribbon. The silver chain tassle is from my stash.

My friend really liked this handmade gift and I have a feeling she will be getting out again for next Christmas. Oh, and another little tip.. when you buy sizzix packs of two embossing folders they are packed in a lovely acetate pillow box... great for recycling hand made gifts like this.!!

I hope you are all having a lovely New Year's Eve. Thank You for visiting my blog today... See you all again Next Year! Lol
Hug
X

Saturday, September 18, 2010

Christmas digi 'Spotlight'

I made this card using one of my new release digi stamps called 'Festive friends' available at the Stitchy Bear & I did it Creations Boutique - pop over there and take a look, once you download it you can use it as many times as you want this christmas on so many of your cards and scrapbook pages and anything else you can imagine up.
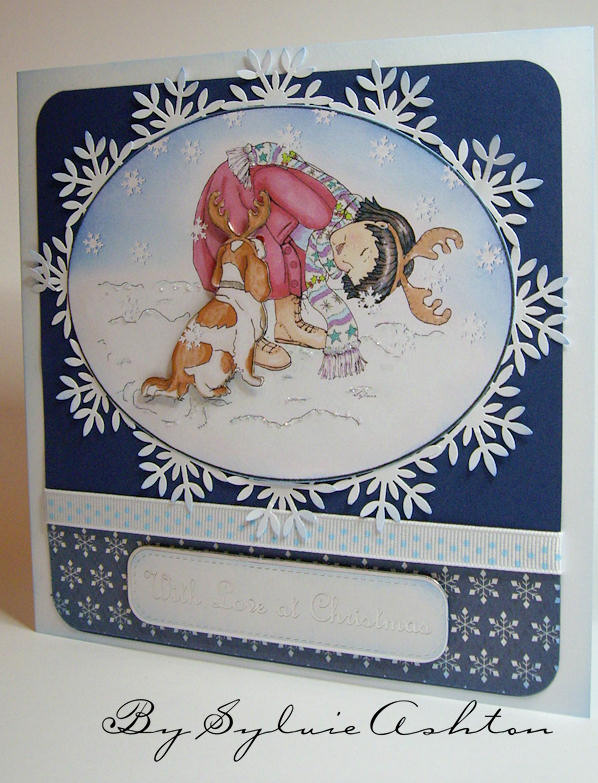
I used promarker pens to colour the stamp and added plenty of glitter on the snow. I enjoyed using a Martha Stewart snowflake punch to make the frame.
I hope you like it and come back to see what other cards I make with it.
Hugs until next time.
XX

Thursday, September 9, 2010

Ballerina card in Pink

Here's the Best Friends digi stamp coloured in pinks and browns this time.
I used pro marker pens and added some stardust pen to their frills and accents and then added some white gel pen over their legs to give the look of lace tights. I made the rose and punched the other flowers using a Martha Stewart punch. I also made the little sliders. I couldn't resist adding tiny little gems as a trail to the butterfly. the papers are from Papermania Summer bloom 12 x 12 paper set.

Come back on Sunday to fine info about a very special challenge to raise funds for a very special little boy.

Thanks for visiting

LinkWithin

Related Posts with Thumbnails